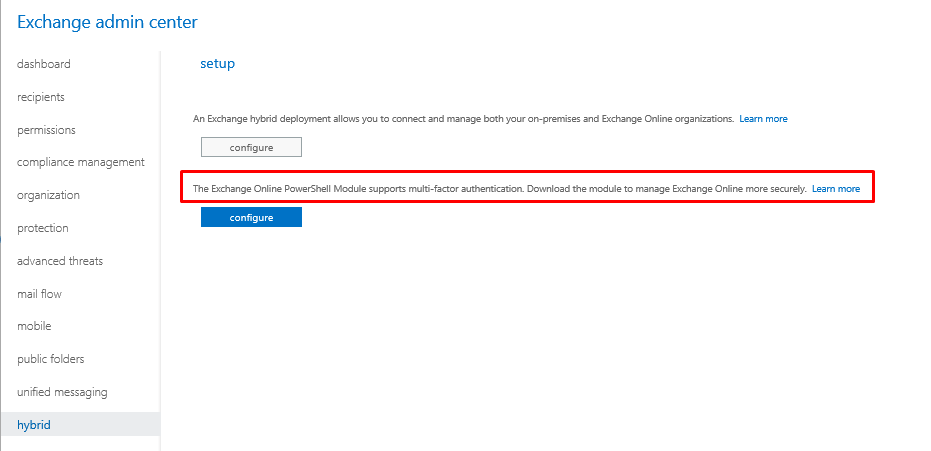
If you have Exchange Online and your users are MFA enabled then you most likely will be using Exchange Online’ s ECP (Exchange Control Panel or Admin Center) to connect to Exchange Online PowerShell through the Hybrid Windows since this is the only supported way with MFA.
Clicking on Configure would install the PowerShell Module of Exchange Online which looks like the below screenshot.
If you have launched Exchange Online PowerShell today then you most likely have noticed there’s a red line stating the possibility to try the new (Preview Version) of Exchange PowerShell V2 .
Microsoft has recently released a new version of Exchange Online PowerShell Module which supports MFA and can be run directly from your computer without the need to login to Exchange Online Admin Center and download any files from there. Check details in this link
As stated in the article, the Module is just in preview so it has some known and maybe unknown bugs as well.
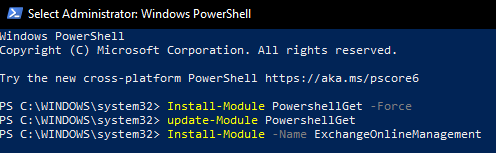
The installation process is pretty straightforward, Launch Windows PowerShel as an Administrator (It’s required for the installation).
Run these 4 cmdlets
Set-ExecutionPolicy RemoteSigned
Install-Module PowershellGet –Force
Update-Module PowershellGet
Install-Module -Name ExchangeOnlineManagement
You might get a warning that the Module you’re about to install is from an Untrusted Repository, Accept it by typing Y and hit enter
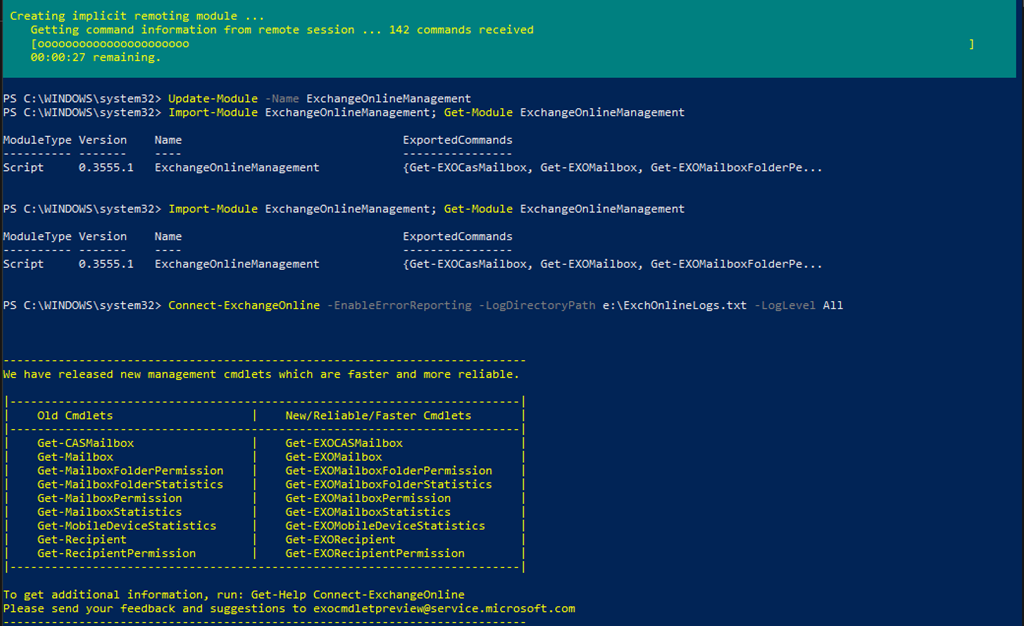
Type the following cmdlet to ensure that Exchange Online Management module is installed
Import-Module ExchangeOnlineManagement; Get-Module ExchangeOnlineManagement
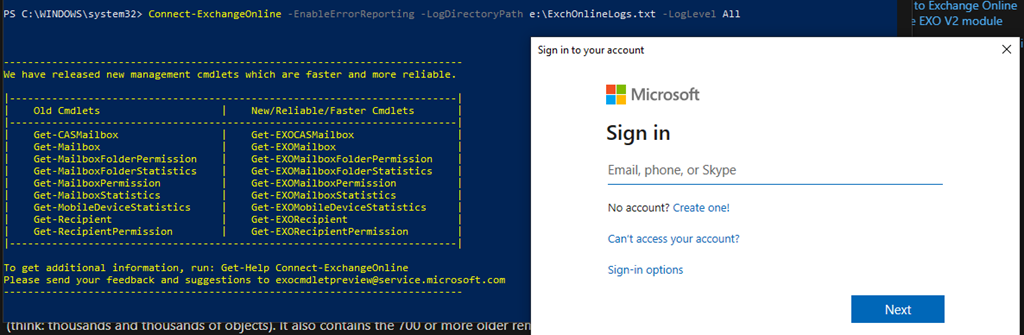
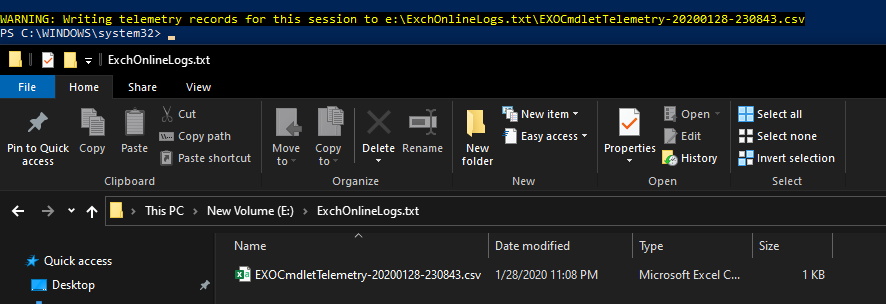
To connect to Exchange Online, Run the following cmdlet along with the new parameter –EnableErrorReporting which gives the ability to record all the cmdlets that you have run along with errors generated as well.
Connect-ExchangeOnline -EnableErrorReporting -LogDirectoryPath e:\ExchOnlineLogs.txt -LogLevel All
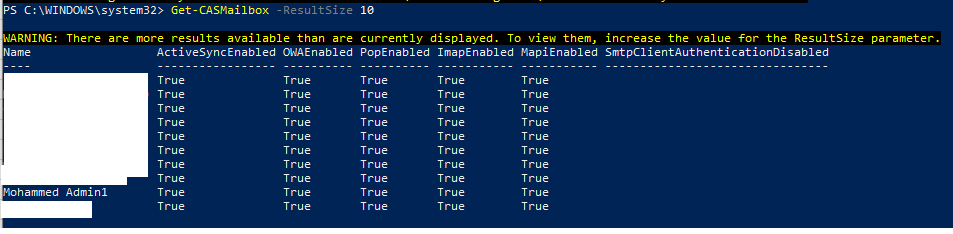
After connecting, I am going to try and run two commands the Old Cmdlets and New Cmdlet and see the difference between them:
Get-CASMailbox -ResultSize 10
Get-EXOCasMailbox -ResultSize 10
The new Cmdlet has much more details, although it says that it runs faster but it took few seconds more than the old one to run (Probably first time).
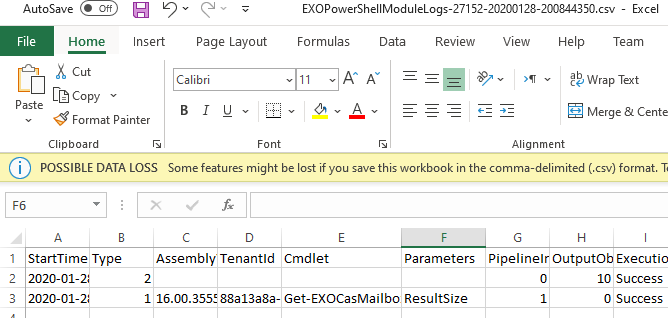
After you run those two Cmdlets, There will be two files generated in the log directory which we have pointed the parameter to save files to.
The CSV files have details about the two cmdlets and the HTTP Method they are utilizing in order to connect along the Request and response latency.
This new version seems to be extremely useful esp in environments where such deep details are needed for troubleshooting issues.
Stay tuned for more
Reset and manage your Active Directory users' Passwords Active Directory is one of the most…
Finding Exchange Database hidden mailboxes. Story:Maybe you have been in this situation before, trying to…
If you're using a Proxy server in your firewall or in your network and have…
Story:I got some clients that have reported some of their users being locked out and…
Delegate Permissions This is a code that I have wrote recently to check if an…
Story: I got a request from a client who constantly gets CVs and have to…