This is a step by step guide about deploying Linux or Windows servers on Azure via CLI.
Some people prefer using Linux rather than PowerShell and it seems sometimes easier and faster to learn esp if you’re not GUI type of person.
If you’re working on Windows and would like to use CLI, you’ll have two options to install CLI
Run Azure CLI installation directly from your Powershell (PowerShell needs to run from a privileged account)
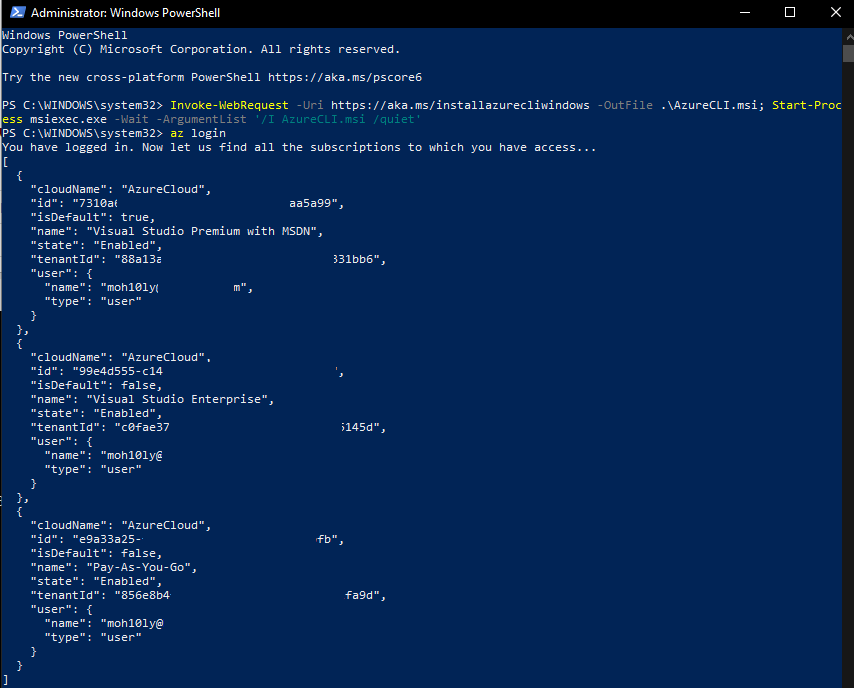
Invoke-WebRequest -Uri https://aka.ms/installazurecliwindows -OutFile .\AzureCLI.msi; Start-Process msiexec.exe -Wait -ArgumentList ‘/I AzureCLI.msi /quiet’
As soon as you run this command, it’ll take about 5 mins or less depending on the connection you have.
Download the MSI file directly from MS’s link and install it on your Computer.
https://docs.microsoft.com/en-us/cli/azure/install-azure-cli-windows?view=azure-cli-latest
Run PowerShell or CMD and type the following command to connect
Az Login then hit enter
As soon as you type this, a web page will be launched asking you for your Azure Account credentials so open the session for your Cli window.
The moment you verified your account, PowerShell will list your azure plans that you have / had before.
If you’re going to use Linux (Ubuntu, Debian) flavor then you’d have to following the following instructions
If you don’t want to run a script as superuser or the all-in-one script fails, follow these steps to install the Azure CLI.
bash
sudo apt-get update

sudo apt-get install ca-certificates curl apt-transport-https lsb-release gnupg
bash
curl -sL https://packages.microsoft.com/keys/microsoft.asc |

    gpg --dearmor |

    sudo tee /etc/apt/trusted.gpg.d/microsoft.asc.gpg > /dev/null
bash
AZ_REPO=$(lsb_release -cs)

echo "deb [arch=amd64] https://packages.microsoft.com/repos/azure-cli/ $AZ_REPO main" |

    sudo tee /etc/apt/sources.list.d/azure-cli.list
package:
bash
sudo apt-get update

sudo apt-get install azure-cli
Run the Azure CLI with the
command. To sign in, use the az login command.
command.
Azure CLI
Try It
az login
If the CLI can open your default browser, it will do so and load an Azure sign-in page.
Otherwise, open a browser page at https://aka.ms/devicelogin and enter the authorization code displayed in your terminal.
To learn more about different authentication methods, see Sign in with Azure CLI.
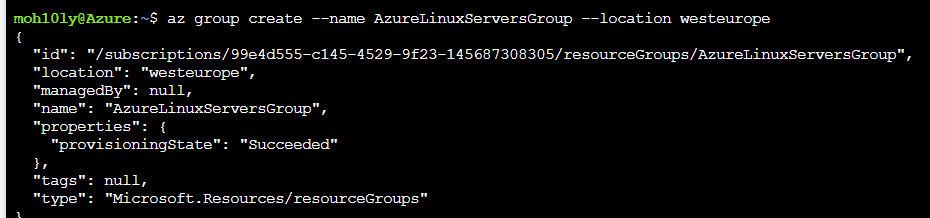
We will start first by creating a Resource Group for our Machine, calling it a AzureLinuxServersGroup to easily identify that this group contains our Linux Servers
az group create –name AzureLinuxServersGroup –location westeurope
First, How we know which Image to use and if that will be proper for our deployment?
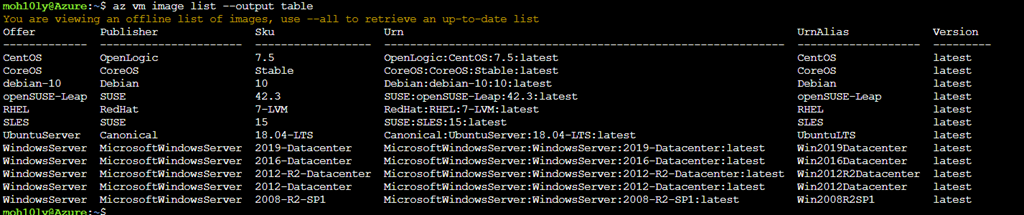
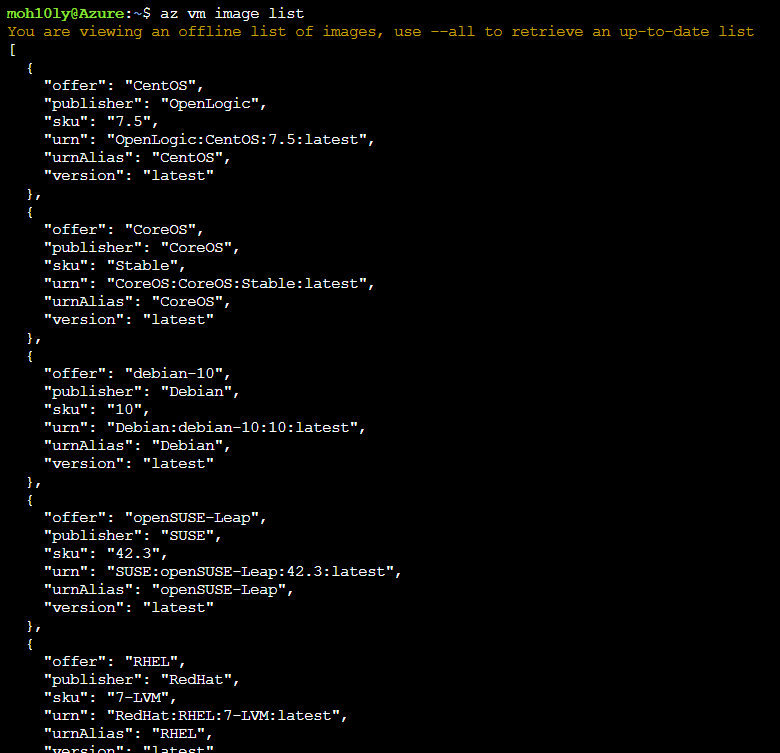
To answer that, we will use the following command which will view the available latest edition Linux OS with different flavors.
I would like to use CentOS since its identical to RedHat and used by majority of Enterprises.
az vm image list –output table
Notice there are many columns, The one which we are going to use in terminal command line is the UrnAlias. It’s important to remember this.
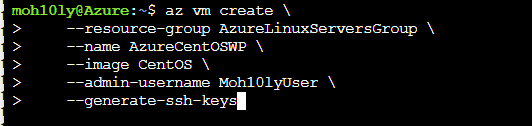
az vm create \
–resource-group AzureLinuxServersGroup \
–name AzureCentOSWP \
–image CentOS \
–admin-username Moh10lyUser \
–generate-ssh-keys
Since we are using Bash, It’s a case sensitive and it complained about user having capital letters. So we’ll go ahead and use small letters
After running the command with small letters, it’s telling us where we can find the keys in order for us to reach and get them to use later to login to this newly created machine.
SSH key files ‘/home/moh10ly/.ssh/id_rsa’ and ‘/home/moh10ly/.ssh/id_rsa.pub’ have been generated under ~/.ssh to allow SSH access to the VM. If using machines without permanent storage, back up your keys to a safe location.
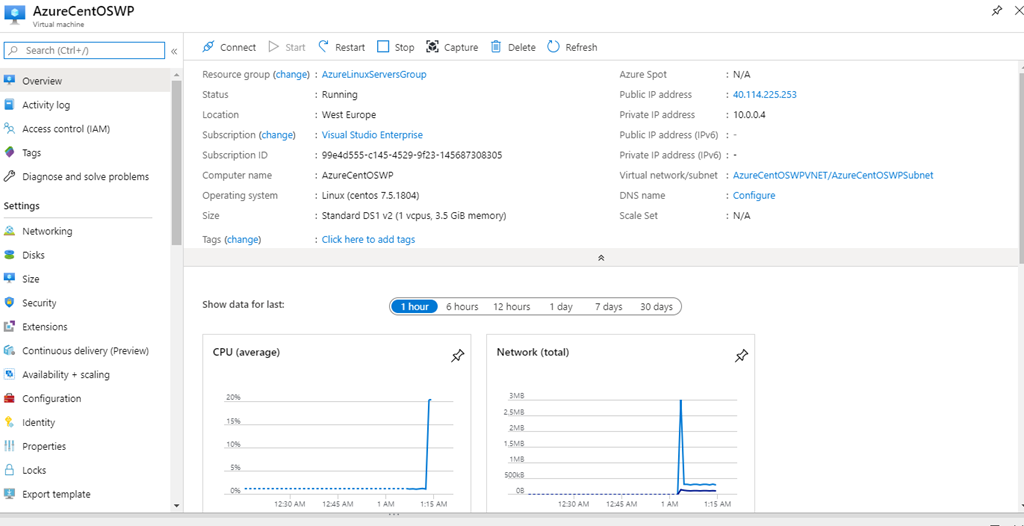
The deployment of the machine takes about 3 mins, and it’ll be created with the default minimum resources. Let’s view
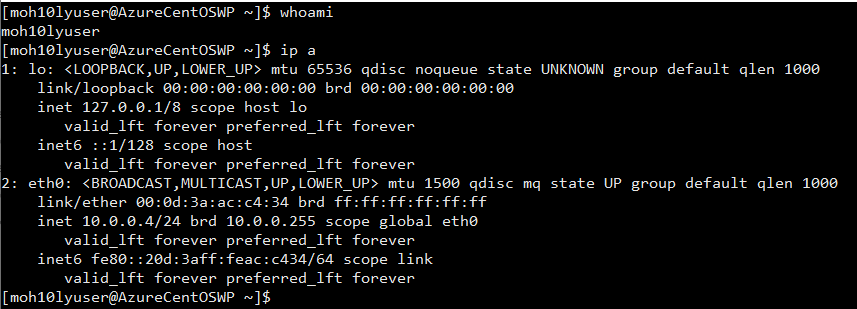
Our machine is ready to be accessed now
In order for you to get the SSH Keys, you’ll have to have a bit of knowledge
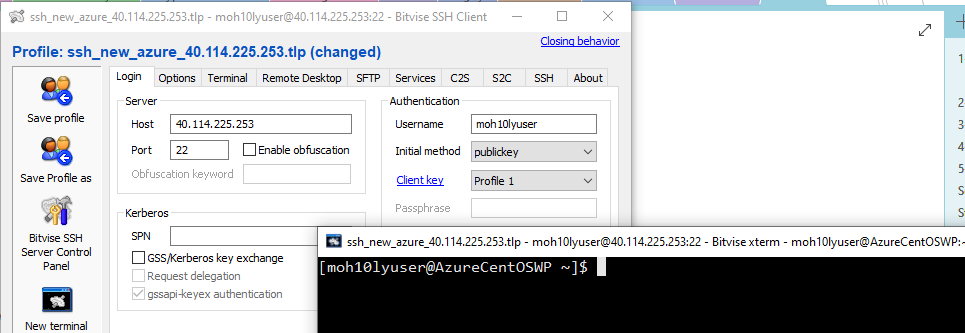
I am going to go the location mentioned previously after creating a machine and copy the keys from the bash screen into a file. Save the file and Import it into SSH client which I will be using (Bitvise in my case).
From the bash screen goto cd /
Cd /home/user/.ssh/
Cat id_rsa hit enter and copy the key and save it into notepad.
Cat id_rsa.pub and copy/save into a notepad as the public key.
After loading both keys, I was able to successfully login to the Server
To view the list of available CentOS images, we’ll use the following cli command
az vm image list -f CentOS –all
The image needs to be grabbed from dockerhub URL
cognosys:wordpress-with-centos-77-free:wordpress-with-centos-77-free:1.2019.1008
az container create –resource-group mohazbackupgroup –name mohcontainer –os-type Linux –image cognosys:wordpress-with-centos-77-free:wordpress-with-centos-77-free:1.2019.1008 –dns-name-label azmohlinux –ports 22
az container create –resource-group mohazbackupgroup –name mohcontainer –os-type windows –image mcr.microsoft.com/windoervercore/centos –dns-name-label azmohlinux –ports 22ws/servercore/iis:nanoserver –dns-name-label azmohiis –ports 80
Here we go I got a machine ready (took about 5 mins)
azmohiis.westeurope.azurecontainer.io
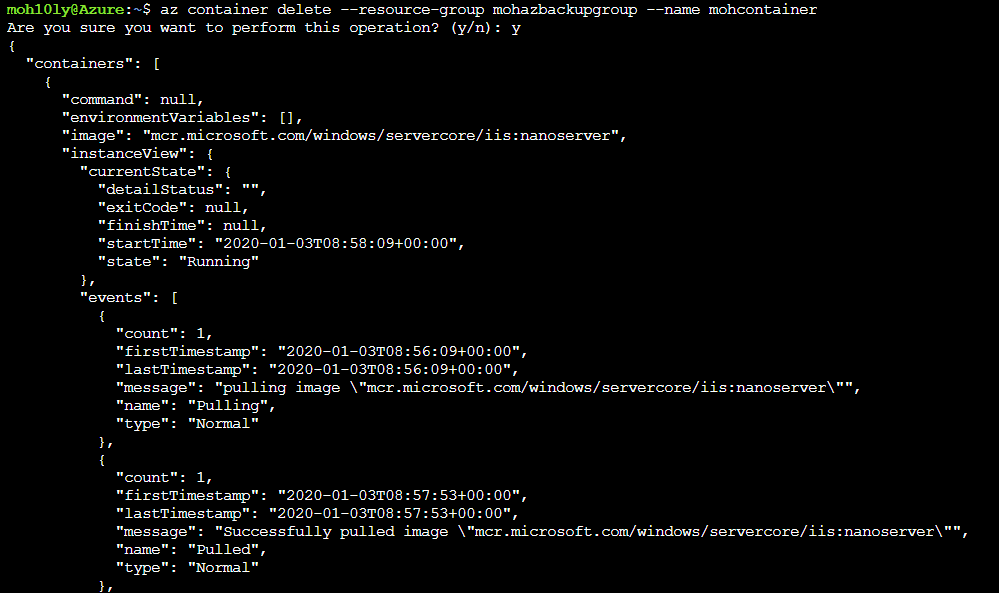
To delete the container, you can write the following
az container delete –resource-group mohazbackupgroup –name mohcontainer
Stay tuned for more articles about Azure.
Reset and manage your Active Directory users' Passwords Active Directory is one of the most…
Finding Exchange Database hidden mailboxes. Story:Maybe you have been in this situation before, trying to…
If you're using a Proxy server in your firewall or in your network and have…
Story:I got some clients that have reported some of their users being locked out and…
Delegate Permissions This is a code that I have wrote recently to check if an…
Story: I got a request from a client who constantly gets CVs and have to…