Installing AsteriskNow (FreePBX 6.12.65) and integration with Lync 2013
Download AsteriskNow from the following Link
http://www.asterisk.org/downloads/asterisknow
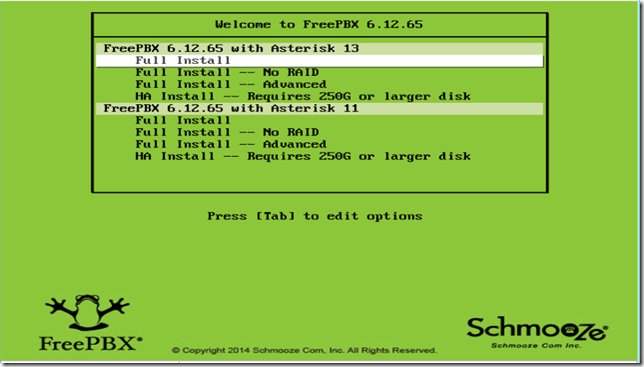
First the setup window will come: there I will choose No RAID on Asterisk 13 since this is a virtual machine.
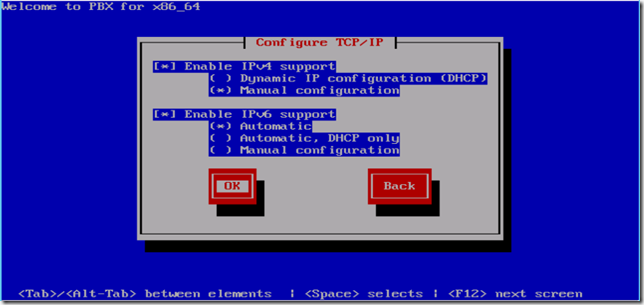
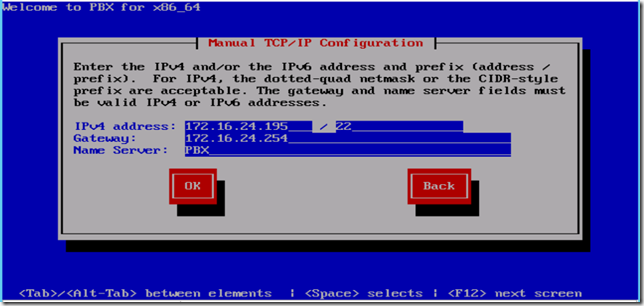
Here I will choose IPv4 static IP (Manual configuration) and click OK
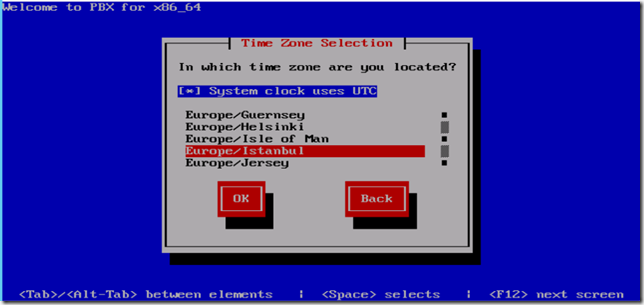
Choose the time zone according to the nearest location to you
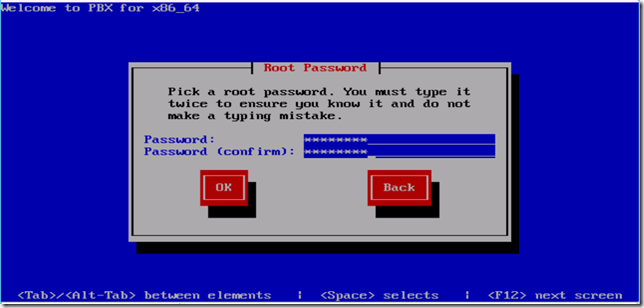
Next, we’ll configure the root password
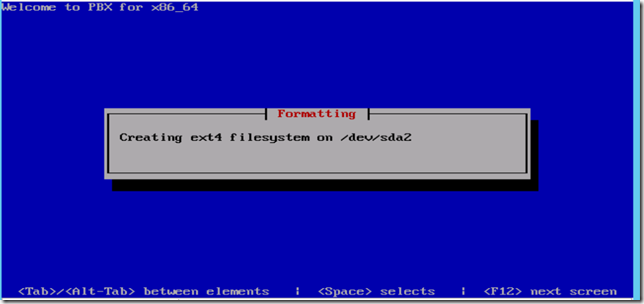
Here it’s formatting the Disk that I have assigned to the VM.
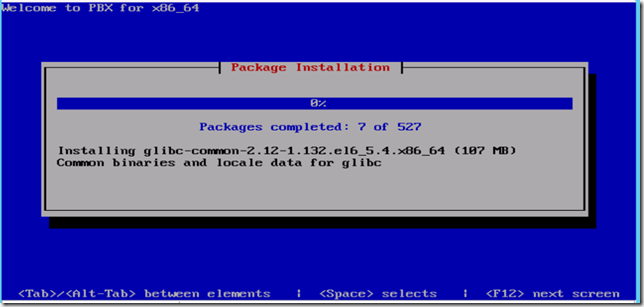
It should start the installation now and should download all the required packages from the internet incase they were not found on the ISO which I’ve loaded.
Now the installation is about to finish and once it does, the machine is supposed to restart on its own allowing you to go to the Web UI.
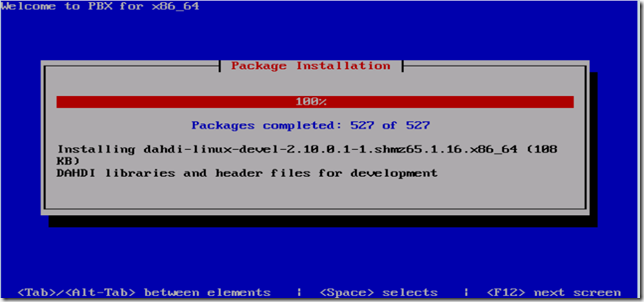
Upon setup and restart, you might get the following error! The error states that your PBX can’t access the internet so you might wanna double check your NIC configuration and that you’re able to reach to it.
This is usually related to the DNS setup on the Centos machine where “AsteriskNow” is setup.

If you do a test and try to update your system from the CLI window you might get this error which is related to the DNS.

To resolve it, you’ll have to replace the localhost with any public DNS e.g. (google or comodo DNS) or any internal DNS that’s capable of reaching out to the internet to resolve this problem.
To edit the DNS you will have to type in the command “nano /etc/resolv.conf”

The default DNS is the localhost

and you’ll have to manually change it and save the settings

Press Ctrl + X and then Press Y to save and hit Enter

To test that we can access the internet you can nslookup google.com for instance and see if it works

Once you are able to resolve the google.com, that error will go.
Now to continue, let’s setup a FreePBX Admin (Make sure you remember both username and password)

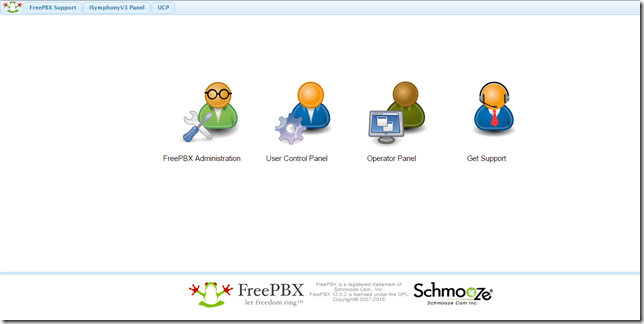
Click on the (FreePBX Administration) and enter the username and password you have just created in the previous step.
This will allow you to the configuration portal
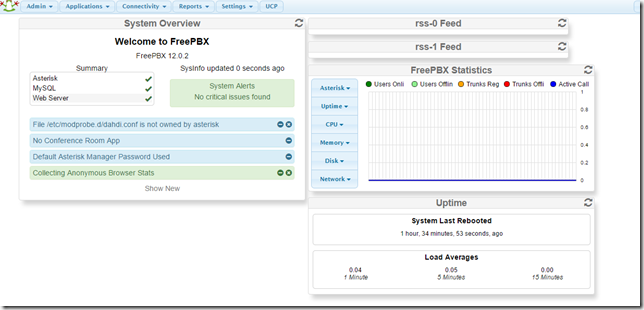
Extensions configuration:
To start, let’s configure an extension (Since I don’t have an IP phone now) so I will use a SIP application for my test (Zoiper or Xlite would do fine)
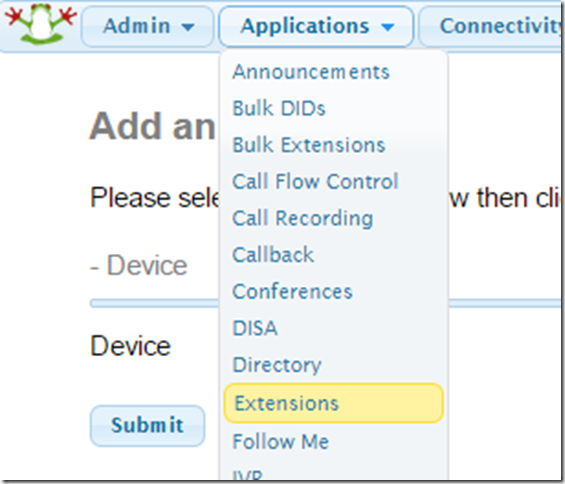
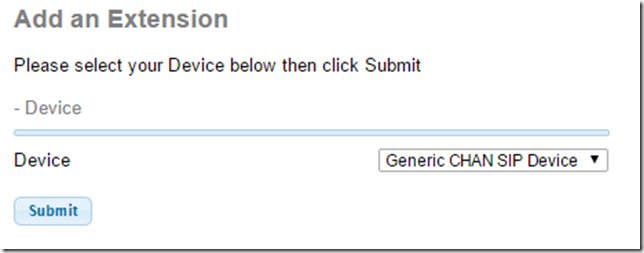
Select Chan SIP device as this talks directly with Lync Trunk then Click Submit once you choose the device .
Now I will configure the new extension’s number, name and secret and port too.

Under device options, you have to set the secret (Password) which you’ll use to login to your sip phone or sip softphone..
Note:
You need to also make sure that the port configured under the device is what will be used for the device to login with this sip extension
so basically the sip port in this case is 5060 which is the default one unless you’re already using a different port then you’ll have to reconfigure it here.

I’ll leave the rest of the options on default value and click submit. Then apply Config
Applying Configuration

Now I will use a soft phone (SIP Application) on my PC to check out if calls are working properly. And for the second extension a second computer with the same software or even A software like Zoiper or Xlite can be utilized on iPhone or Android for the same purpose.

No other settings are required on the SIP phone after that it should register without an issue. And you’ll be able to make calls between SIP phones
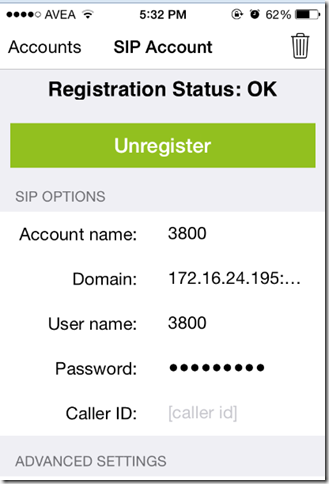
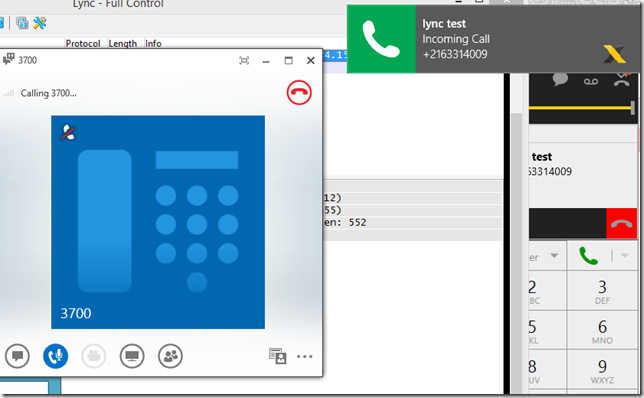
I am going to call my computer (3700) sip phone (Xlite) from my iPhone (Zoiper) soft phone (3800)
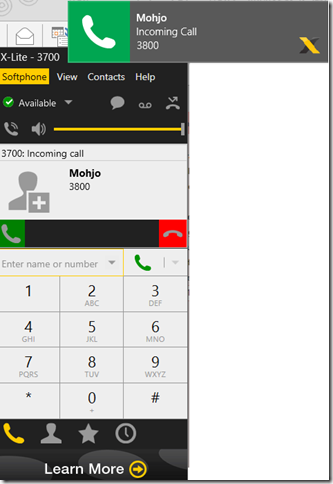
So calls are working properly between SIP extensions, now we’ll have to go configure Lync and Asterisk Configuration.
Before starting, we’ll have to enable the TCP protocol on Asterisk for Lync to send calls to Asterisk since Lync talks only TCP.
Enabling Asterisk to listen on TCP
Enable TCP for Lync and SIP Phones for Asterisk
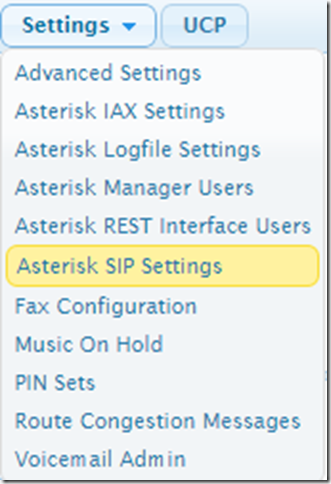
I’ll have to configure the local networks and the RTP port range as well.
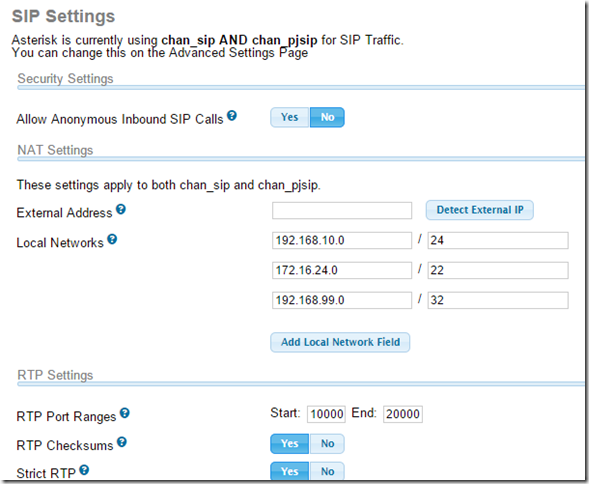
Next I’ll click on Submit, and apply configuration then on top right I’ll click on Chan SIP to configure the ports and the right protocol
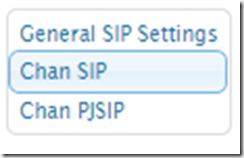
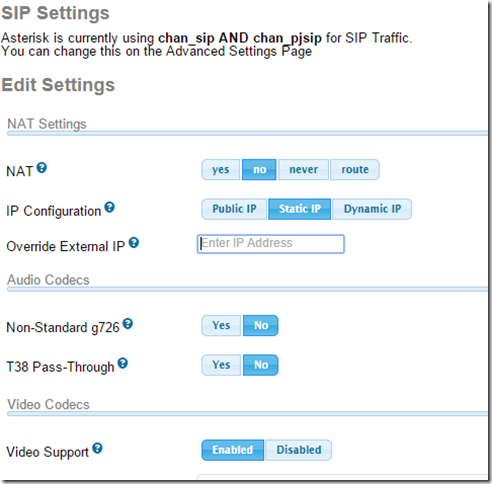
Under SIP Settings, make sure your settings matches the snapshot below, then navigate to advanced settings
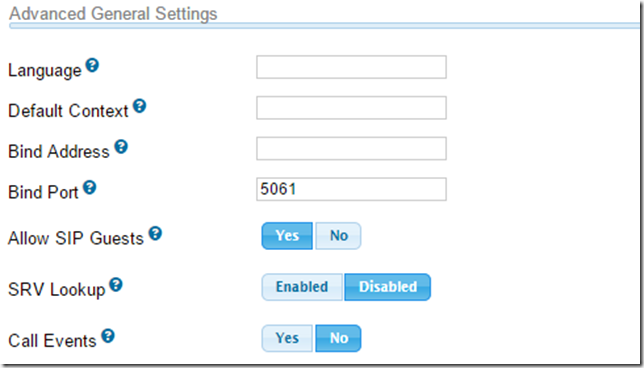
Under Advanced General settings make sure that CHAN_SIP is bind to port 5061 or else calls from Lync will fail with “Unauthorized” error code.
Once you change the port scroll further down to Other SIP settings and add the following variables
Tcpenable = Yes
Transport = tcp

Submit the changes and apply the configuration.
Lync Configuration
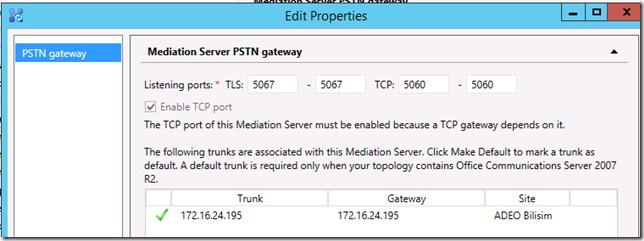
Now I will go on Lync server now (Standard edition) and enable the TCP port for the mediation server (Collocated mediation service)
To do so
Right click on your Mediation server and edit properties and Enable TCP port and change it from 5068 to 5060.
I will publish the topology
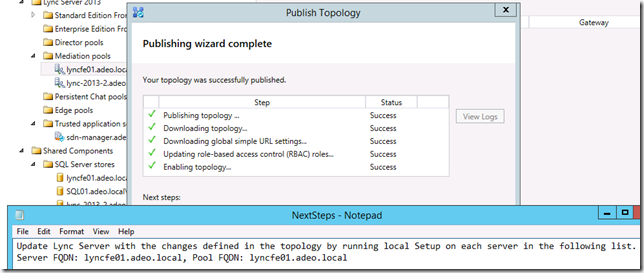
Published the topology and now it’s time to run the setup as it will install the mediation server role on Front end.
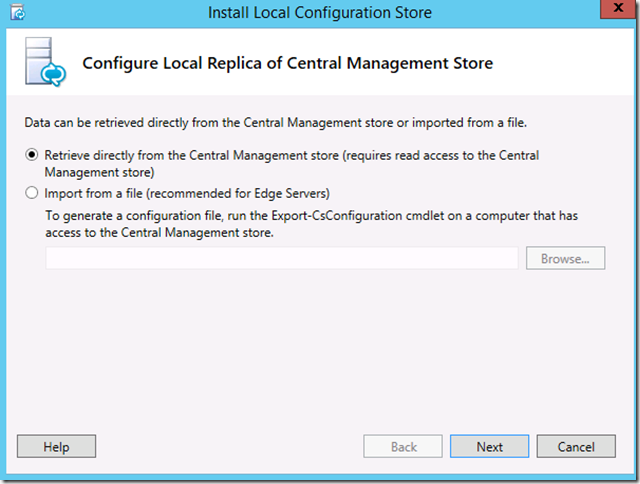
Next I will run the second step (Setup or remove Lync Server Components):
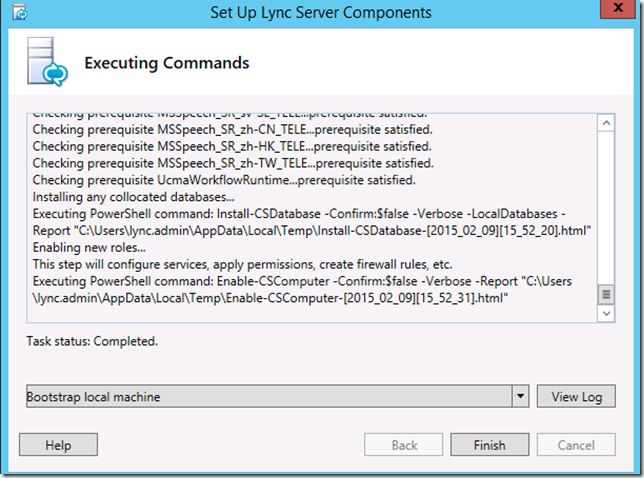
I will go check if the mediation service is enabled now

I will run the command netstat -anb >1.txt
The command will export all the ports status on the server including each of the Lync services.

So Lync mediation service is listening on the default sip port 5060.
Now I will go back to the topology and add the PSTN Gateway (AsteriskNow)
Right click on PSTN Gateways –> Click add PSTN gateways
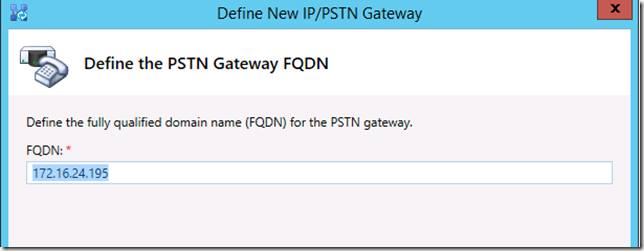
Next
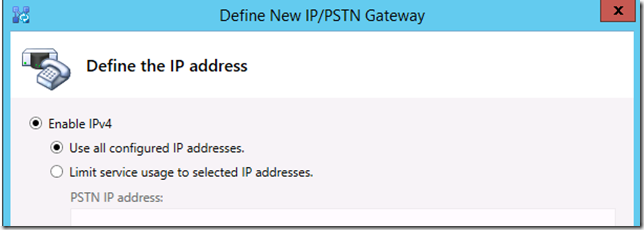
Next, I will type in the AsteriskNow PBX IP address and the port that “Chan_SIP” driver is listening on since all calls are going to be routed to it.
And will select my mediation server and the Mediation server’s configured port on Lync.
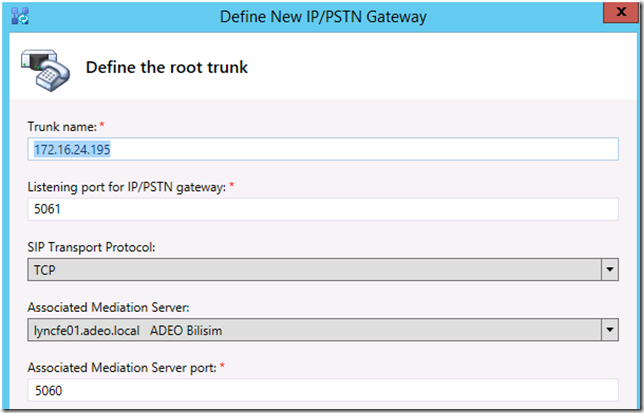
Click Finish and Right click on your front end server and click properties
Make sure you
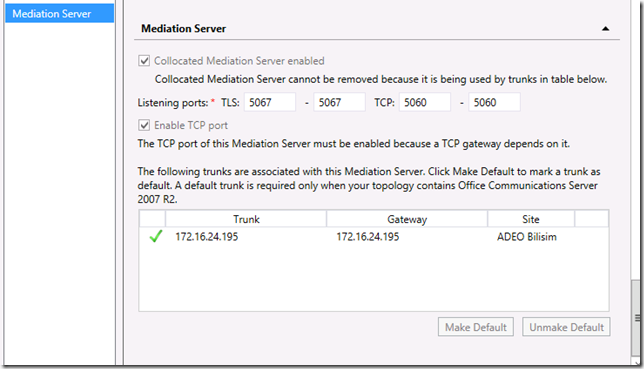
Click on Make default and then OK then publish the topology
Asterisk Configuration
Asterisk side of the Integration
In order for the configuration to work, we’ll have to configure a new trunk of the Asterisk IP PBX to identify where is the Lync server ..etc
Let’s go to our Asterisk portal, configure new trunk by going to Connectivity -> Trunks then choose “Add SIP(chan_sip) Trunk”
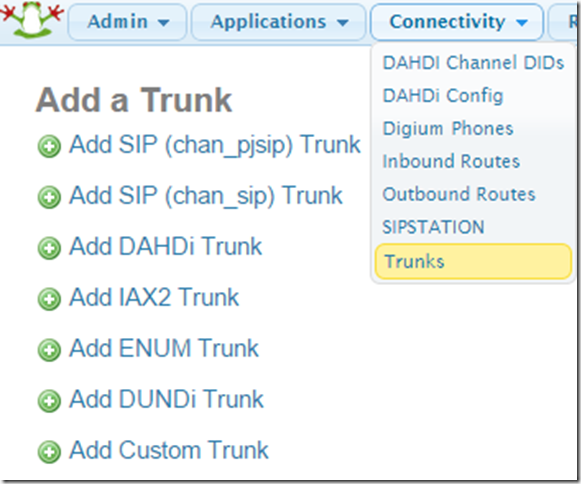
You will need to fulfill the boxes in red below each with what pertain to it.
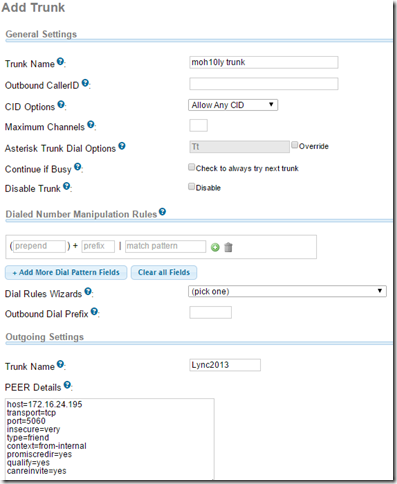
The IP 172.16.24.195 is my Mediation server (Front end since Mediation server is collocated)
TCP is the protocol that Lync uses
5060 is the port which Lync listens on
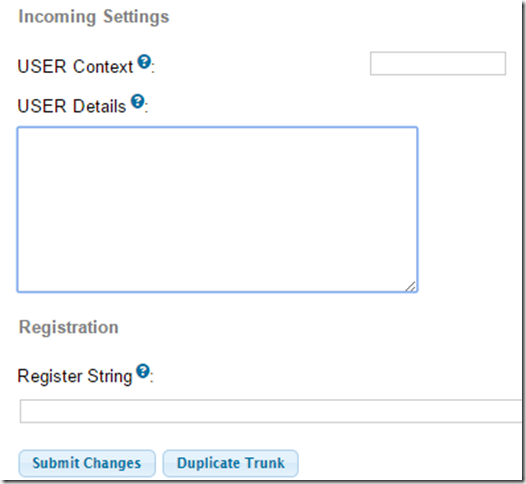
I will clear all the settings below “User Details” and save this trunk
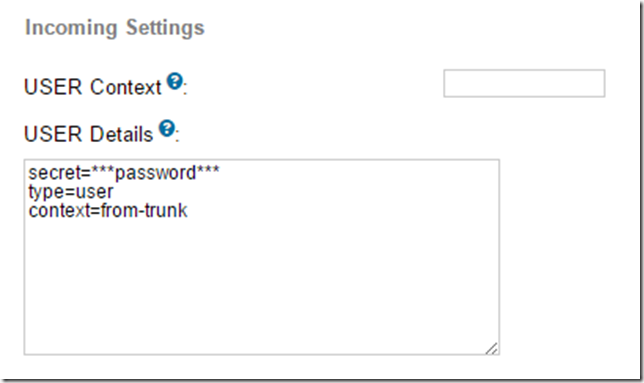
Now field cleared and next will click on Submit Changes.
Inbound Routes
I have applied the configuration and now it’s time to create routes on Asterisk to route calls to Lync.
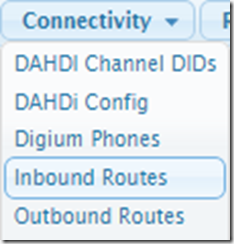
To configure routes, click on Connectivity and then Inbound routes
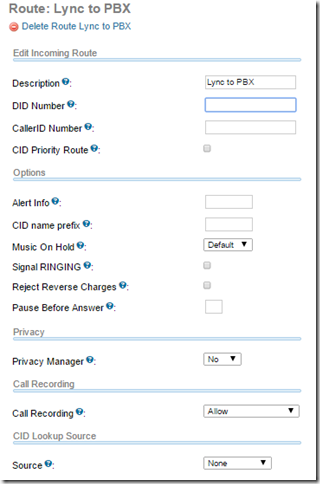
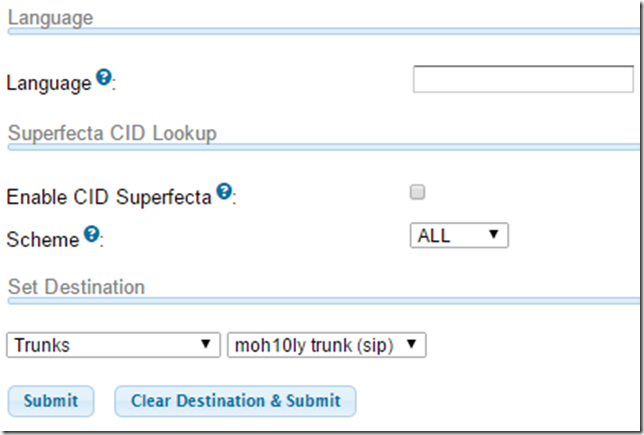
Click Submit now and Apply Config for changes to take effect

Outbound Routes
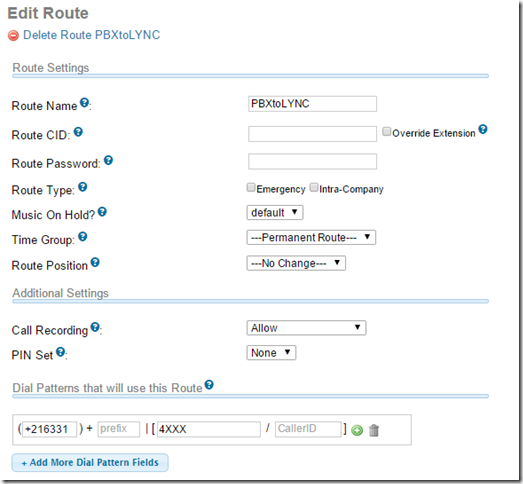
It’s time to configure the outbound routes, Depending on your Lync users URI or telephone number and extension number you will have to configure
Your outbound routes according so it will be able to route it properly to Lync users.
I’m going to show my user’s uri and extension on Lync server and what does it look like now
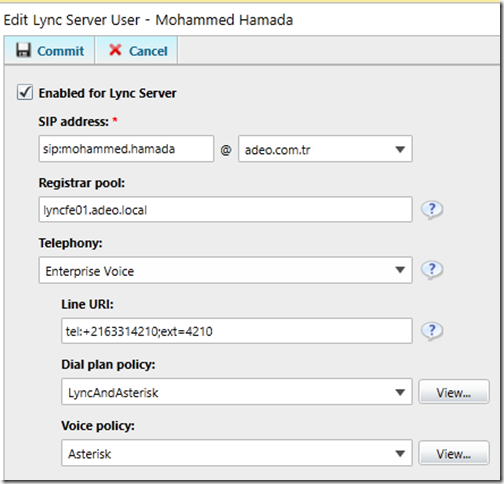
So the entire number is +2163314210 but my extension is basically 4210
Now again click on Connectivity > Outbound routes and add new “Dial Pattern” as following
The +216331 will be automatically entered by AsteriskNow once you dial the number defined in the “Match Pattern” field

Once finished configuring the required dial patterns you can submit and apply …
Lync Voice Route Configuration
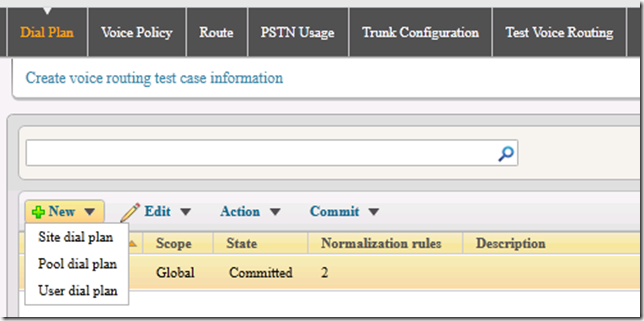
Now it’s time to go configure Lync Routes, Go to Lync Server and open the Control panel, Go to Voice routing there we will go under the dial plan
tab and choose New \ User Dial Plan.
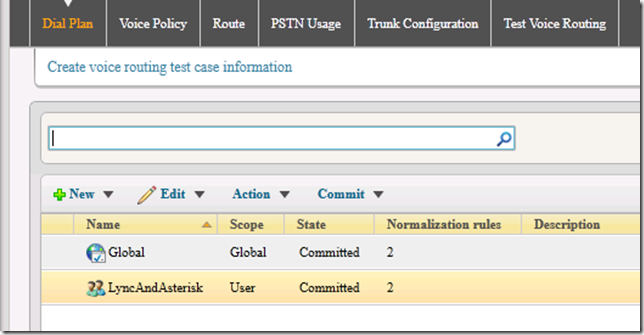
If you don’t want to mess up your Global dial plan or let every new user be able to use this dial plan ,you will have to configure a user dial plan.
I will have to create 2 normalization rules at least in the new dial plan. The first one is going to normalize the inbound numbers
And the second one is going to normalize the outbound.
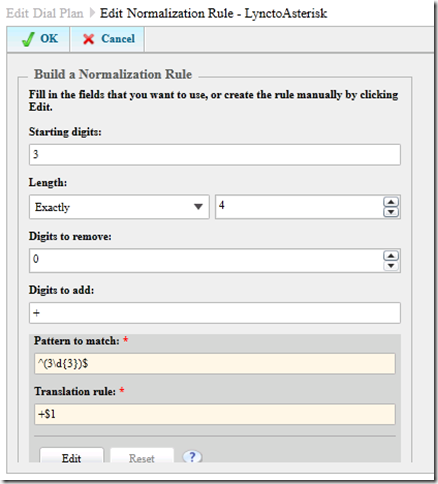
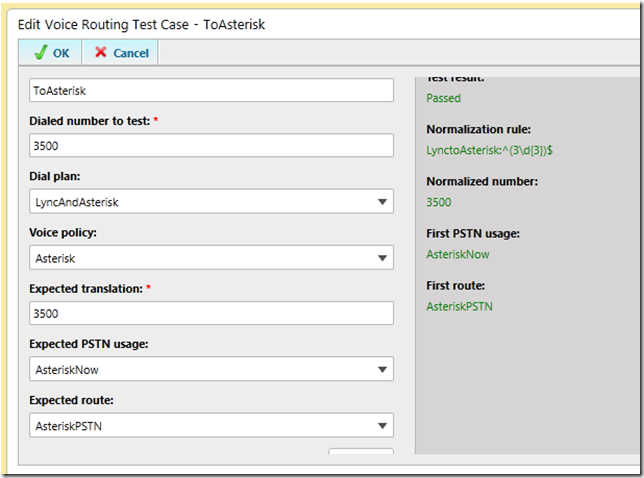
Since on PBX I choose to create extensions that begins with 3 and are 4 digits long, I will create a normalization rule that’s exactly 4 digits
And it starts with 3. depending on your PBX configuration for the extension and inbound routes Lync needs to either have or not have the + in the dial plan
Now I will create the second dial plan which is from Asterisk to Lync “To match the full URI”
The normalization rule that I am creating here is 10 digits long and it starts with 21633 and it has + digits to add
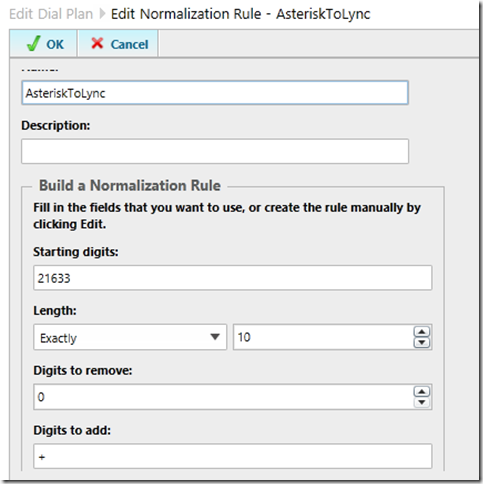
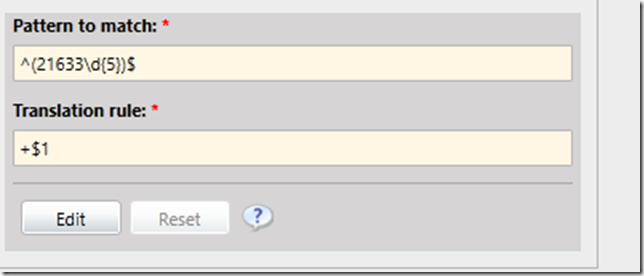
After creating the Dial plans, it’s time to test them now! I will go to the Test Voice Routing Tab and create a test
So the test for Asterisk Extensions goes well
Now I will test the Lync dial plan
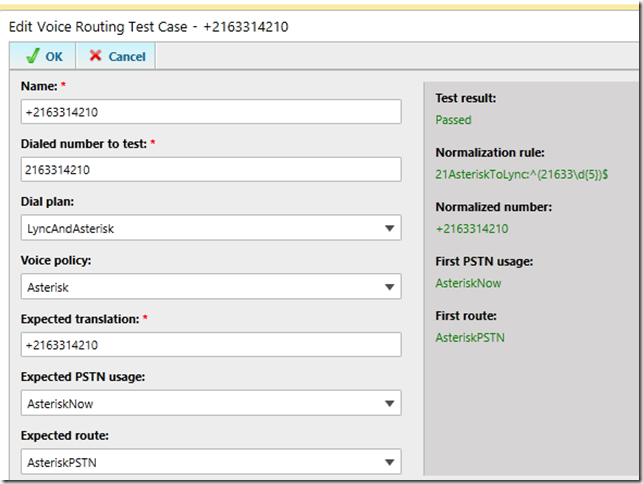
Since Asterisk is going to send the full URI as it will auto complete it even if the user enters the extension only (4210) then our rule is configured properly
Now after configuring rules and testing them it’s time to go to Voice Policy tab and create a new voice policy for Asterisk
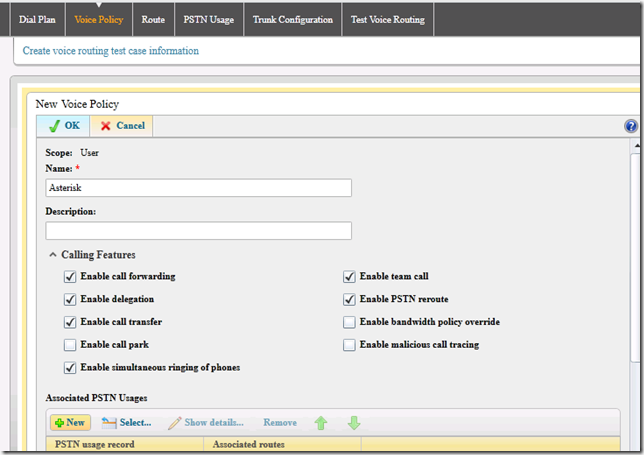
Click on New under “Associated PSTN Usages”
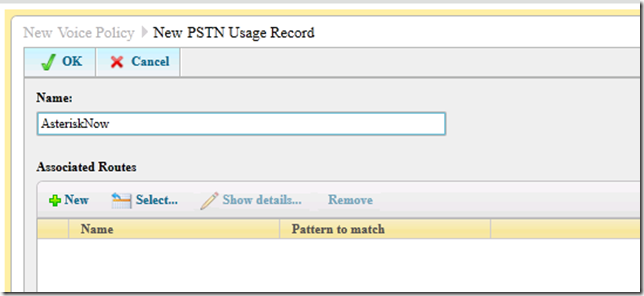
Click on New under Associated Routes
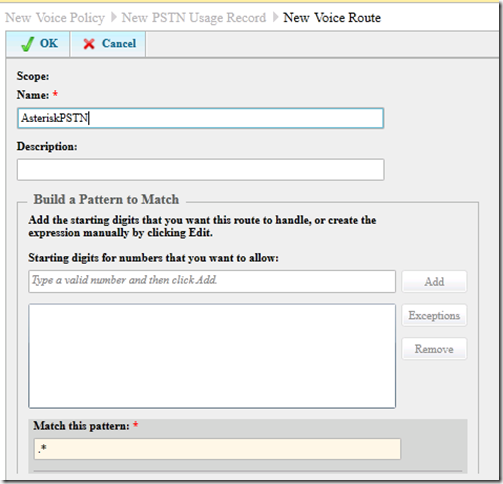
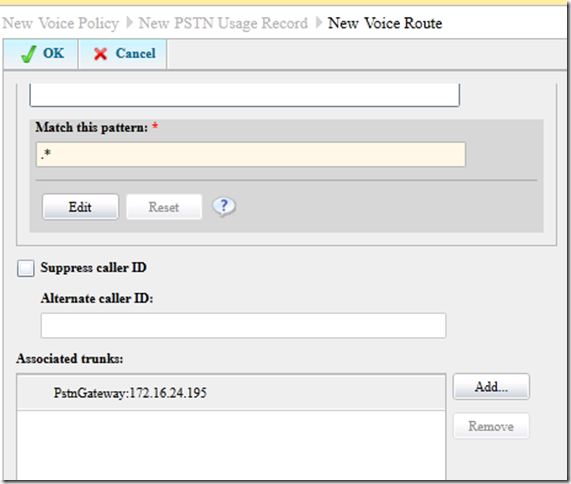
You can leave the pattern .* (Which will allow all calls) for the time being until we test everything between both systems.
Scroll down and click on Add next to “Associated Trunks”
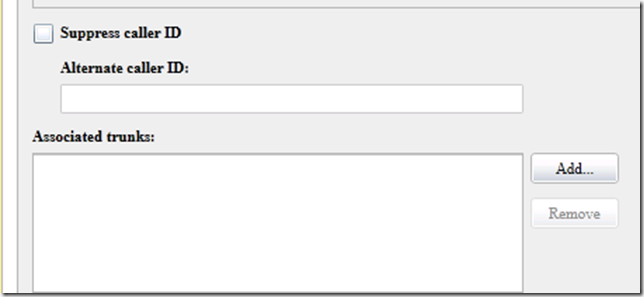
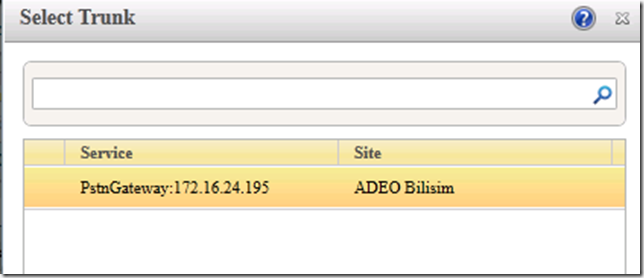
Select the available trunk and add it then Click OK 3 times and commit all changes
Now after applying all the configuration, It’s time to apply some tests.
From Asterisk to Lync
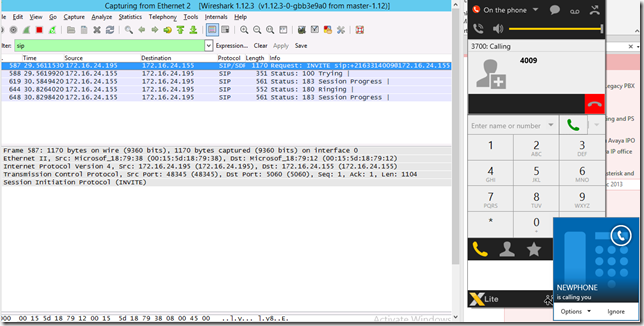
Below when I initiated the call I managed to see the SIP invite coming from the IP “172.16.24.195” which is my AsteriskNOW PBX IP going to Lync and then the phone starts ringing.
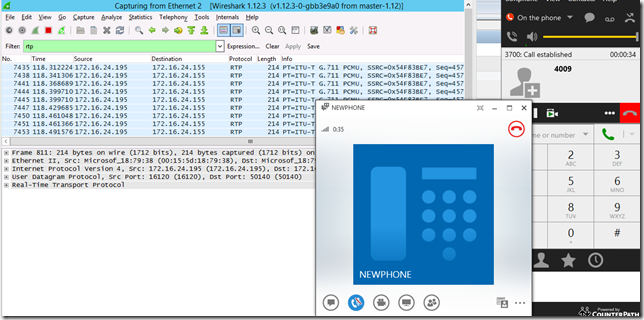
When I have answered the call the RTP starts flowing.
Here I typed RTP in the Wireshark filter and could see the RTP media flowing between Asterisk and Lync Mediation server on the G.711 codec.
Note:
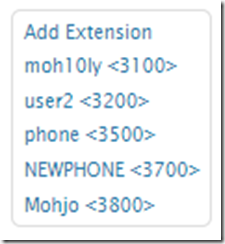
What I like about Asterisk is that it sends all users information along with the call and doesn’t strip them out, in extension information I have typed the extension name as “NEWPHONE” and put it all in capitals.
From Lync to Asterisk
Since the call is from Lync to Asterisk, then I will have to run wireshark or trace on Asterisk to see the Invite.
You can see Asterisk logs if you click on “Reports> Asterisk LogFiles”

Once the call has ended I was able to see that in detail as well in the logs.
All the media was

Next few days I will install and configure Brekeke to work with both (Asterisk and Lync) in the same environment… and share my deployment update with you all.